Introduction
Hi, I'm Olivia Stone, a certified nutritionist and recipe developer who believes good health begins in the gut. In 2025 the interest in home fermentation and DIY probiotic foods continues to grow, and more people are looking to integrate Probiotics & Supplements into everyday cooking through easy, at-home projects like sauerkraut, kombucha, and kefir. Over the last decade I've taught hundreds of home cooks how to make fermented foods that are safe, tasty, and actually helpful for the microbiome. This guide covers the best fermentation starter kits for beginners, how they support Probiotics & Supplements routines, and what to look for when choosing a kit.
Fermentation starter kits are an accessible entry point for anyone wanting to add reliable, food-based probiotics to their diet while reducing reliance on packaged supplements. They help you control ingredients, salt levels, and ferment time so the cultures you create are tailored to your taste and digestive needs. When paired with a thoughtful Probiotics & Supplements plan - including prebiotic fiber and targeted live cultures - homemade ferments can be a cost-effective source of beneficial microbes and postbiotic compounds.
Why this category matters: consumers are demanding more transparency in how their probiotics are produced, and they're increasingly skeptical of one-size-fits-all supplement approaches. Fermented foods like sauerkraut, kombucha, and kefir deliver diverse microbes along with vitamins, organic acids, and enzymes that work differently than capsule supplements. Starter kits lower the barrier to entry by bundling the right tools - SCOBYs, grains, crocks, weights, and detailed instructions - so a person new to fermentation can get predictable results.
Market trends in 2025 show continued growth in the probiotics & supplements sector, with a parallel rise in culinary fermentation. People want whole-food probiotic sources that can complement their daily supplement routines rather than replace them outright. Brands that combine clear lab-tested cultures, user-friendly equipment, and educational support are winning trust. You'll also see hybrid products that include dried starter cultures or probiotic sachets to jump-start a ferment, which is useful for beginners who are nervous about maintaining live cultures.
I wrote this guide to combine practical product reviews, nutrition-driven insight, and step-by-step advice so you can choose a fermentation kit that fits your kitchen, budget, and wellness goals. Throughout I'll reference how each kit supports a broader Probiotics & Supplements strategy - whether you're pairing a homemade kefir with a multi-strain capsule or using sauerkraut as a daily condiment to boost gut diversity. Expect clear comparisons, care tips, troubleshooting, and full specs so you can make a confident purchase.
Top Fermentation Starter Kits for Beginners
Cultures For Health Kombucha Starter Kit
Why this product is included: Cultures For Health (CFH) is a trusted brand in home fermentation education and supplies comprehensive kits that include a healthy SCOBY, starter liquid, and clear instructions. For beginners who want to make kombucha that complements their Probiotics & Supplements routine, this kit is a dependable choice because it balances accessibility with quality starter cultures and includes troubleshooting support.
Description
This Cultures For Health Kombucha Starter Kit comes with a fresh SCOBY, 8 oz of starter tea, a 1-gallon glass brewing jar, breathable cloth cover, rubber band, and a detailed digital brewing guide plus recipes. The SCOBY provided is a live symbiotic colony grown under controlled conditions, intended to lower failure rates that new brewers often encounter. The kit covers basic brewing steps and also suggests ways to pair kombucha with dietary supplements or prebiotics to maximize gut-supporting benefits.

- Complete kit - includes SCOBY, starter liquid, and jar for a full first brew, making it easy for beginners to start without extra purchases.
- Trusted source - Cultures For Health has an educational focus and strong customer support, which reduces user error.
- Good for Probiotics & Supplements plans - enables creation of a live beverage that adds diverse cultures alongside supplement use.
- Recipe variety - includes flavoring and second-fermentation tips to make kombucha you actually want to drink daily.
- Reasonable price for lab-cultured SCOBY and starter liquid - better value vs sourcing separately.
- Requires attention to sanitation and timing - not completely hands-off, you'll need to monitor temperature and ferment time.
- SCOBY care is ongoing - you'll need to maintain a SCOBY hotel for future batches, which can be intimidating for beginners.
- Glass jar size may be too bulky for small apartments with limited counter space.
Technical Information and Performance Analysis
Expected fermentation time: 7-14 days at 70-78 F for primary fermentation. Secondary fermentation for carbonation: 2-5 days. Typical pH progression: starting around pH 4.5-5.0 moving to pH 3.0-3.5 over primary fermentation. SCOBY growth: new pellicle often forms within 7-10 days. Carbonation metrics: bottles conditioned at 70-75 F can reach moderate carbonation in 2-4 days; if you prefer higher fizz, condition at warmer temps but check pressure daily. Typical colony forming units (CFU) in kombucha vary widely; homemade kombucha often contains 10^4 to 10^7 CFU per ml of various bacteria and yeasts, though exact counts depend on ferment time and temperature. Note that CFU counts are not guaranteed by the kit - if CFU-specific supplementation is your goal, combine kombucha with targeted probiotic supplements labeled with CFU counts.
User Experience and Real-World Scenarios
Beginners report success within 2-3 batches, once they master water quality and sugar ratios. I've used this kit in small workshops and found that people in cool climates (65 F or below) need to use a heating mat or warm cabinet to hit ideal ferment temps. For people balancing Probiotics & Supplements, I recommend drinking a small glass (4-8 oz) daily and spacing it 2-3 hours away from probiotic capsules to let different strains colonize transiently without direct competition.
Maintenance and Care
- Sanitize all equipment with hot water - no harsh chemicals.
- After each batch, reserve 1-2 cups of starter liquid in a clean jar to start the next brew.
- Store extra SCOBYs in a SCOBY hotel with enough starter liquid, keep at room temp out of direct sunlight.
- If you take a break, refrigerate the SCOBY hotel for up to 2 weeks; longer refrigeration increases risk of mold.
- Replace cloth covers annually or wash them between uses to prevent dust contamination.
Compatibility and Use Cases
Best for: people who want a daily probiotic beverage, those who are pairing food-based probiotics with supplements, and home cooks interested in flavor experimentation. Not ideal for: people who need exact CFU dosing for clinical reasons. Apartment dwellers can brew smaller batches and use 1-quart jars for testing, while families can scale to multiple 1-gallon jars.
"A live, healthy SCOBY and clear instructions remove the biggest barrier for new kombucha brewers." - Hannah Crum, Founder Kombucha Kamp
Comparison Table - Kombucha Kit Features
| Feature | Included | Beginner Friendly | Price Range |
|---|---|---|---|
| SCOBY | Yes | High | $ |
| Starter Liquid | 8 oz | High | $ |
| Support | Online guides | High | $ |
Testimonials and Case Studies
"I was nervous about making kombucha but this kit made it simple. My energy and digestion improved when I added an 4 oz glass after dinner." - Sarah, workshop attendee.
Troubleshooting Guide
- No pellicle forming - check temperature (should be 70-78 F) and ensure starter liquid is acidic enough; add 1 cup of strong store-bought kombucha or 1/2 cup distilled vinegar as a temporary acidifier.
- Mold on surface - discard the batch and sanitize thoroughly; ensure cloth cover fits snugly to keep out dust while allowing airflow.
- Overly vinegary taste - shorten primary ferment time or reduce ambient temperature slightly.
Cultures For Health Kefir Starter Kit
Why this product is included: Cultures For Health also offers a reliable kefir starter kit with live milk kefir grains and starter packets for water kefir. Kefir grains produce a robust probiotic beverage with high microbial diversity, making them a great food-based complement to Probiotics & Supplements programs. For beginners, the CFH kit reduces confusion by supplying grains that are already active and providing clear, step-by-step recipes.
Description
The CFH Kefir Starter Kit typically includes live milk kefir grains (or dehydrated grains with reactivation instructions), a fine-mesh plastic strainer, fermentation jar, and an instruction booklet. The grains are a symbiotic mix of bacteria and yeasts that ferment milk into a tangy, yogurt-like drink in 24-48 hours at 68-78 F. Water kefir grains, offered in a separate kit, transform sugar water into a lightly carbonated beverage in 24-72 hours. Both types are easy to maintain once you learn the basics.

- High microbial diversity compared to many single-strain supplements, offering broader gut support.
- Fast ferment times - milk kefir is ready in 24-48 hours, great for busy schedules.
- Reusable culture - kefir grains grow over time, giving long-term value.
- Flexible use - drink plain, blend into smoothies, or use as a base for dressings.
- Good educational resources from the brand help beginners avoid common pitfalls.
- Requires ongoing care - grains need regular feeding and occasional refrigeration, which some users find like a small pet.
- Milk kefir uses dairy - those with lactose intolerance may tolerate kefir better than milk but should proceed cautiously.
- Kefir flavors can be strong - not everyone likes the tangy profile at first.
Technical Information and Performance Analysis
Fermentation times: milk kefir 24-48 hours at 68-78 F; water kefir 24-72 hours depending on sugar concentration and temperature. Typical pH: 4.2-4.6 for milk kefir after fermentation. Grain growth: expect 10-20% growth in grain mass every month with regular feeding. Yield: 1 tablespoon of grains can ferment about 1 quart of milk. When combined with Probiotics & Supplements, milk kefir can be an inexpensive, high-return source of live cultures - long-term ROI is high since grains reproduce and reduce ongoing costs after initial purchase.
User Experience and Real-World Scenarios
New users often find milk kefir to be the easiest fermented dairy to maintain because it ferments quickly and is forgiving of minor temperature swings. I advise clients to start with glass jars on a warm counter and to strain using a plastic strainer to avoid metal interaction with the grains. For non-dairy diets, water kefir grains or fermented coconut milk kefir alternatives work well, although grains may behave differently with alternative milks.
Maintenance and Care
- Feed grains regularly - for milk kefir, replace milk every 24-48 hours.
- Rinse grains carefully with non-chlorinated water if you plan a short break, but avoid washing with soap.
- For travel: store grains in a small jar with enough milk and refrigerate up to 2 weeks, or dehydrate grains per CFH instructions for longer storage.
- Occasional grain health check - if grains become slimy or discolored, discard and request a replacement from the supplier.
Compatibility and Use Cases
Great for daily probiotic intake, especially for people who dislike pills. Kefir is an excellent base for smoothies and breakfast bowls, boosting nutrient density and probiotic diversity. For those using Probiotics & Supplements, alternating kefir days with capsule days can broaden microbial exposure. Not recommended for those with severe milk allergies; water kefir is a better choice for strict dairy-free diets.
"Kefir grains are one of the most cost-effective ways to deliver a variety of beneficial microbes consistently at home." - Dr. Emily Hart, Microbiome Researcher
Comparison Table - Kefir Kit Features
| Feature | Milk Kefir | Water Kefir |
|---|---|---|
| Ferment Time | 24-48 hours | 24-72 hours |
| Reusability | High | High |
| Dairy | Yes | No |
Testimonials and Case Studies
"My bloating decreased after 2 weeks of adding 4 oz kefir daily while keeping my probiotic supplements on alternating days." - Mark, client from my gut-health workshop.
Troubleshooting Guide
- Grains not fermenting - ensure milk is fresh and temperature is within range; try a warmer location or slightly longer ferment time.
- Strange colors - if grains turn gray or black, discard as this indicates contamination.
- Too tart - reduce ferment time or use cooler temperatures.
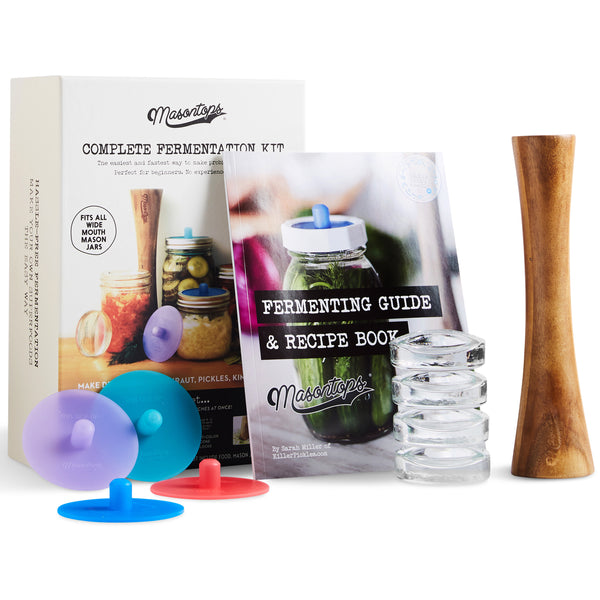
Masontops Fermentation Kit for Sauerkraut and Vegetables
Why this product is included: Masontops provides a modern, practical approach to vegetable fermentation with glass fermenting lids, weights, and jar kits designed to work with standard mason jars. Sauerkraut is one of the simplest and most reliable ferments for beginners, and Masontops kits make it easy to manage airlock and brine levels so you get consistent results that fit into a Probiotics & Supplements lifestyle.
Description
The Masontops Fermentation Kit includes a set of fermentation lids with silicone gaskets, airlock caps, fermentation weights, and sometimes a recipe booklet. The system converts regular mason jars into reliable fermenting vessels, keeping jars sealed while releasing CO2 through an airlock. This keeps oxygen out and reduces mold risk. The kit is ideal for sauerkraut - all you need is cabbage, salt (2% by weight recommended), a jar, and these tools. Masontops parts are durable, easy to clean, and stackable, which is perfect for kitchens with limited space.
- Converts regular mason jars into professional fermenters, maximizing existing kitchen equipment.
- Airlock reduces oxygen exposure, leading to more predictable, cleaner ferments.
- Compact - great for apartment use where a large crock is impractical.
- Easy to clean and reusable, reducing waste compared to single-use options.
- Brine and salt control supports consistent probiotic growth and flavor.
- Limited batch size per jar - for large families you need multiple jars.
- Metal lids can corrode if not rinsed regularly; follow care instructions closely.
- Doesn't include salt or fermentation-specific ingredients, so you must buy those separately.
Technical Information and Performance Analysis
Recommended salt ratio for sauerkraut: 2% by weight (for example, 20 g salt per 1,000 g cabbage). Fermentation time: 5-21 days depending on temperature and taste preference. Ideal temperature: 65-72 F for slower, more complex flavors; 72-75 F for quicker, tangier results. Brine levels: maintain vegetables fully submerged with weights; check daily for any rising floaters. Expected lactic acid bacteria dominance leads to pH dropping to 3.5-4.2 after full fermentation. ROI: low cost for supplies and salt, making homemade sauerkraut an inexpensive probiotic source compared to many supplements.
User Experience and Real-World Scenarios
In my workshops I often demonstrate sauerkraut using Masontops lids because participants feel confident seeing the airlock bubbling. For small households, a single quart jar can produce condiment-sized batches over 1-2 weeks, which fits well with weekly meal prep. This kit works well for people integrating Probiotics & Supplements because sauerkraut is shelf-stable once fermented and can be portioned and frozen for long-term use.
Maintenance and Care
- Rinse lids and weights after each use to remove salt residue and prevent metal corrosion.
- Disassemble airlock and clean with a bottle brush; ensure silicone parts are rinsed and dried.
- Store lids dry between uses to prolong gasket life.
- Check silicone gaskets monthly for wear and replace as needed to maintain seal integrity.
Compatibility and Use Cases
Perfect for people who want small-batch ferments, apartment dwellers, or cooks who already use mason jars. Not ideal for large-volume fermenters who prefer ceramic crocks for bulk batches. Works well in tandem with Probiotics & Supplements, especially when used as a regular condiment to increase microbial diversity and dietary fiber intake.
"Simple tools like airlock lids make successful vegetable fermentation accessible and consistent for first-time fermenters." - Olivia Stone, Certified Nutritionist and Recipe Developer
Comparison Table - Masontops Kit Capabilities
| Feature | Function | Best For |
|---|---|---|
| Airlock | Releases CO2 | Prevent mold |
| Weights | Keep veg submerged | Consistent brine |
| Compatibility | Mason jars | Small batches |
Testimonials and Case Studies
"I now make a quart of sauerkraut every week and use it like a daily side. It's cheaper than buying probiotic capsules and tastes great." - Ana, home fermenter.
Troubleshooting Guide
- Surface scum - often yeast; skim off and ensure veg remain submerged. If mold forms, discard and start over.
- Soft or slimy texture - may indicate too much salt or poor water quality; try adjusting salt and using filtered water.
- Lid leaking - check gasket seating and replace if worn.
Ball Mason Jar Fermentation Kit With Fermentation Lids
Why this product is included: Ball is a legacy brand for home canning and fermentation. Their mason jar fermentation lids and starter kits are widely available, budget-friendly, and compatible with supplies most home cooks already own. For beginners who want a low-cost entry into fermented foods and who may already keep Ball jars in the pantry, this kit is a practical introduction to making sauerkraut, simple pickles, and small-batch kombucha or kefir blends.
Description
The Ball Mason Jar Fermentation Kit usually includes a set of two-piece lids with airlock adapters or simple vented lids, silicone seals, and sometimes a silicone weight. The pieces convert standard Ball mason jars into fermentation vessels. While basic compared to full kits, Ball's parts are durable and affordable, making it easy to scale experiments. The simplicity of the product appeals to budget-conscious beginners who want to try fermented foods without investing in a full kit right away.

- Affordable and widely available at major retailers.
- Compatible with standard Ball jars most households already have.
- Good for small test batches - reduces waste while you learn.
- Simple design means minimal parts to clean and store.
- Works well for fermenting vegetables and storing starter liquids.
- Less advanced airlock control compared to dedicated fermentation systems.
- Some kits need additional weights or cloths not included.
- Not optimized for kombucha carbonation compared to glass-bottle systems.
Technical Information and Performance Analysis
Standard jar sizes: pint (16 oz), quart (32 oz), gallon conversion possible with wide-mouth jars. Airflow control: vented lids provide passive gas release; airlock-adapter lids allow CO2 escape while minimizing oxygen ingress. For sauerkraut, follow 2% salt by weight. For small-batch water kefir, adjust sugar ratio: 1/4 cup sugar per quart water for modest carbonation. Cost analysis: initial kit under $20 commonly, with jars reusable for years - low upfront cost and quick ROI for those who make a jar or two weekly.
User Experience and Real-World Scenarios
Many of my clients start with Ball lids because they already have jars and the learning curve is gentle. If you are also using Probiotics & Supplements, Ball jars are great for creating small batches to test tolerance before introducing a high-dose capsule. The compact jars fit in a small cupboard and are easy to refrigerate once fermentation reaches preferred tanginess.
Maintenance and Care
- Wash lids and seals in warm soapy water, rinse well and air dry.
- Inspect silicone seals for cracks and replace annually if used frequently.
- Avoid boiling metal lids with silicone parts attached; separte components when cleaning to prolong life.
Compatibility and Use Cases
Best for beginners, budget shoppers, and apartment cooks who want to make small experiments and learn without big purchases. Ball kits are also ideal for people integrating fermented foods gradually into their Probiotics & Supplements routines, since jars allow portion control and easy refrigeration.
"Start small and learn the rhythms of fermentation. Ball jars make that first step easy and cost effective." - Olivia Stone, Certified Nutritionist
Comparison Table - Ball Kit Versus Dedicated Systems
| Feature | Ball Kit | Dedicated System (e.g., crock) |
|---|---|---|
| Cost | Low | Higher |
| Batch Size | Small | Large |
| Ease of Use | High for small batches | Moderate |
Testimonials and Case Studies
"Using Ball lids I made my first sauerkraut with almost zero waste and now I share small jars with family." - James, weekend fermenter.
Troubleshooting Guide
- Lid pressure - if lids swell, release pressure gently and move jars to cooler spot for slower fermentation.
- Seal failure - switch to fresh silicone seals and check threading on jar rim for burrs or damage.
- Unexpected yeast bloom - skim surface and ensure vegetables stay submerged under brine.
Buying Guide: How to Choose Fermentation Starter Kits
Choosing the right fermentation starter kit depends on several criteria: the types of ferments you want to make, your kitchen space, your budget, and how the kit fits into your broader Probiotics & Supplements strategy. Below I outline a friendly, practical scoring system and considerations to help you decide.
Selection Criteria and Scoring System
Score each kit 1-5 on the following factors and total the points. Kits scoring 18+ are excellent for beginners aiming to support Probiotics & Supplements goals.
- Included Live Cultures (1-5): Are active cultures or SCOBYs/grains included?
- Ease of Use (1-5): Clear instructions and forgiving processes?
- Support/Education (1-5): Does the brand offer troubleshooting or community support?
- Durability/Materials (1-5): Are lids, weights, and jars built to last?
- Value (1-5): Cost relative to included components and long-term ROI?
Budget Considerations and Value Analysis
Price ranges in 2025:
- Budget starter kits: 5-30 - basic lids and small components, good for trials.
- Mid-range kits: $30-75 - include live SCOBYs, grains, or quality lids and weights.
- Premium kits: $75-150+ - full systems with glass crocks, multiple jars, and premium starters.
Cost projections: A mid-range kit that includes reusable grains or a SCOBY will usually pay for itself within 2-6 months compared to buying equivalent store-bought probiotic products. Consider the value of education and support, which often reduces failure rates and saves money long term.
Maintenance and Longevity
Long-term costs include replacement seals, occasional new grains or SCOBYs if contamination occurs, and minimal consumables like salt and sugar. Expect to replace silicone gaskets every 12-24 months with regular use; budget $5-15 per replacement. If you ferment weekly, factor in jar wear and possible replacement lids over 3-5 years.
Compatibility and Use Case Scenarios
If you live in a small apartment, favor jar-based kits like Ball or Masontops that use minimal space. Families or frequent fermenters should choose larger systems or multiple jars and consider breathable storage for SCOBY hotels. Medical users who need specific CFU dosages should pair food ferments with labeled Probiotics & Supplements - ferments add diversity but rarely provide precise CFU counts.
Expert Recommendations and Best Practices
Experts recommend starting with small batches to learn the process - don't try a gallon crock on week one. Keep a fermentation journal tracking temps, salt ratios, and taste notes. When combining fermented foods with supplements, stagger timing - take capsule probiotics in the morning and fermented foods later to diversify exposures across the day.
Comparison Matrix
Factor Beginner Priority Advanced Priority Live Cultures Included High Medium Batch Size Small Large Cost Low-Mid Mid-High Seasonal Considerations and Timing
Season affects fermentation speed - ferments run faster in warm months, which can change flavor. Start with small test jars when seasons shift to dial in times. Fall and winter are great for starting a SCOBY hotel since ambient temps may be cooler and more stable in many homes.
Warranty and Support
Check for replacement guarantees on live cultures and warranties on hardware. Brands like Cultures For Health often replace damaged or contaminated starters if you follow their protocol. For silicone parts, expect manufacturer warranties of 6-12 months on defects; extended support is a sign of a reliable vendor.
FAQ
How often should I feed kefir grains or SCOBYs? You should feed kefir grains every 24-48 hours for milk kefir and refresh SCOBYs every 1-2 weeks by making a new kombucha batch or setting up a SCOBY hotel; regular feeding keeps cultures active and healthy.
Can I use non-chlorinated tap water for fermentation? Yes but avoid chlorinated water as it can harm cultures; use filtered or spring water for best results. If only tap water is available, let it sit out for 24 hours to let chlorine dissipate, or use a carbon filter.
How do I know if my ferment is safe to eat? Safe ferments smell pleasantly sour or tangy, have no fuzzy mold (black, green, or white fuzzy spots are bad), and stay submerged under brine. If you see fuzzy mold or a rotten smell, discard the batch and sanitize your equipment.
What's the ideal temperature for fermenting sauerkraut? Aim for 65-72 F for flavorful sauerkraut; higher temps speed fermentation but can create more sour, less nuanced flavors. Use a heating mat if your home is cooler than the target range.
How do I pair homemade ferments with probiotic supplements? Space them out across the day - for example, take a probiotic capsule in the morning and enjoy 4-8 oz of kefir or kombucha at lunch or dinner to diversify exposure. Combining foods and supplements can be complementary, not redundant.
Can I ferment with plant-based milks? Yes, water kefir and non-dairy milk kefir alternatives can be done, but grains sometimes behave differently; expect texture and flavor changes and monitor grains for long-term health.
What are unusual signs a ferment is unhappy? An unusual sign is a slimy film or a very sour vinegar smell developing overnight; these can indicate contamination or overly long fermentation, so taste cautiously and consider restarting with fresh starter and cleaned jars.
Can I freeze excess kombucha or sauerkraut? Yes, freezing preserves flavor and probiotic activity to some extent; freeze in airtight containers and thaw slowly in the refrigerator before consuming. Texture may change slightly once frozen.
How do I store a SCOBY hotel long-term? For up to 2 weeks keep the SCOBY hotel at room temp with enough starter liquid; for longer storage refrigerate briefly or dehydrate grains per brand instructions. Regularly check for off-smells or discoloration.
Are there environmental impacts to consider? Homemade fermentation reduces single-use packaging but uses jars and energy; compost your vegetable scraps and reuse jars to minimize impact. Choosing locally made kits and long-lasting materials reduces overall footprint.
What is the best way to scale up once I'm confident? Move from jars to ceramic crocks or multiple jars in rotation, track yields and costs, and calculate ROI based on how much you save versus store-bought probiotic foods and supplements.
Should children or pregnant people consume homemade ferments? Many pediatricians and midwives support small amounts of fermented foods for most people, but consult a healthcare provider if you have concerns, a compromised immune system, or pregnancy-related issues.
Conclusion
Fermentation starter kits make it possible for almost anyone to add nutrient-dense, probiotic-rich foods to their diet while complementing a Probiotics & Supplements plan. Start small, choose a kit that matches your kitchen size and learning goals, and prioritize kits that include live cultures and clear support. Combining homemade ferments with targeted supplements can broaden your microbial exposure and provide both short-term and long-term gut support.
My top practical tips: pick a kit that includes live starters if you want reliability, keep a fermentation journal so you can learn from each batch, and budget for small replacement parts like gaskets over time. If you want the simplest route into food-based probiotics, start with a Masontops or Ball jar system for sauerkraut, or a Cultures For Health kit for kombucha and kefir. Experimentation will help you find flavors you enjoy and portions that fit into your routine.
If you use probiotic supplements, view fermented foods as a complementary strategy rather than a replacement - the combination often gives better results than either approach alone. Finally, stay curious and patient - fermentation is a craft as much as a science, and each batch will teach you something new.
Good luck, and enjoy the process of making foods that support your gut and taste great too. If you'd like, check back for recipes and troubleshooting workshops where I walk through real batches and share my favorite Probiotics & Supplements pairing ideas.